
Pegboard Storage
Keep frequently used tools and materials visible, within reach, and easy to put back. A pegboard's repeating holes let you rearrange hooks, holders, and bins as your work changes.
Choosing a pegboard means more than choosing a panel. Hole shape, layout, dimensions, panel thickness, and mounting method together determine which accessories will fit.
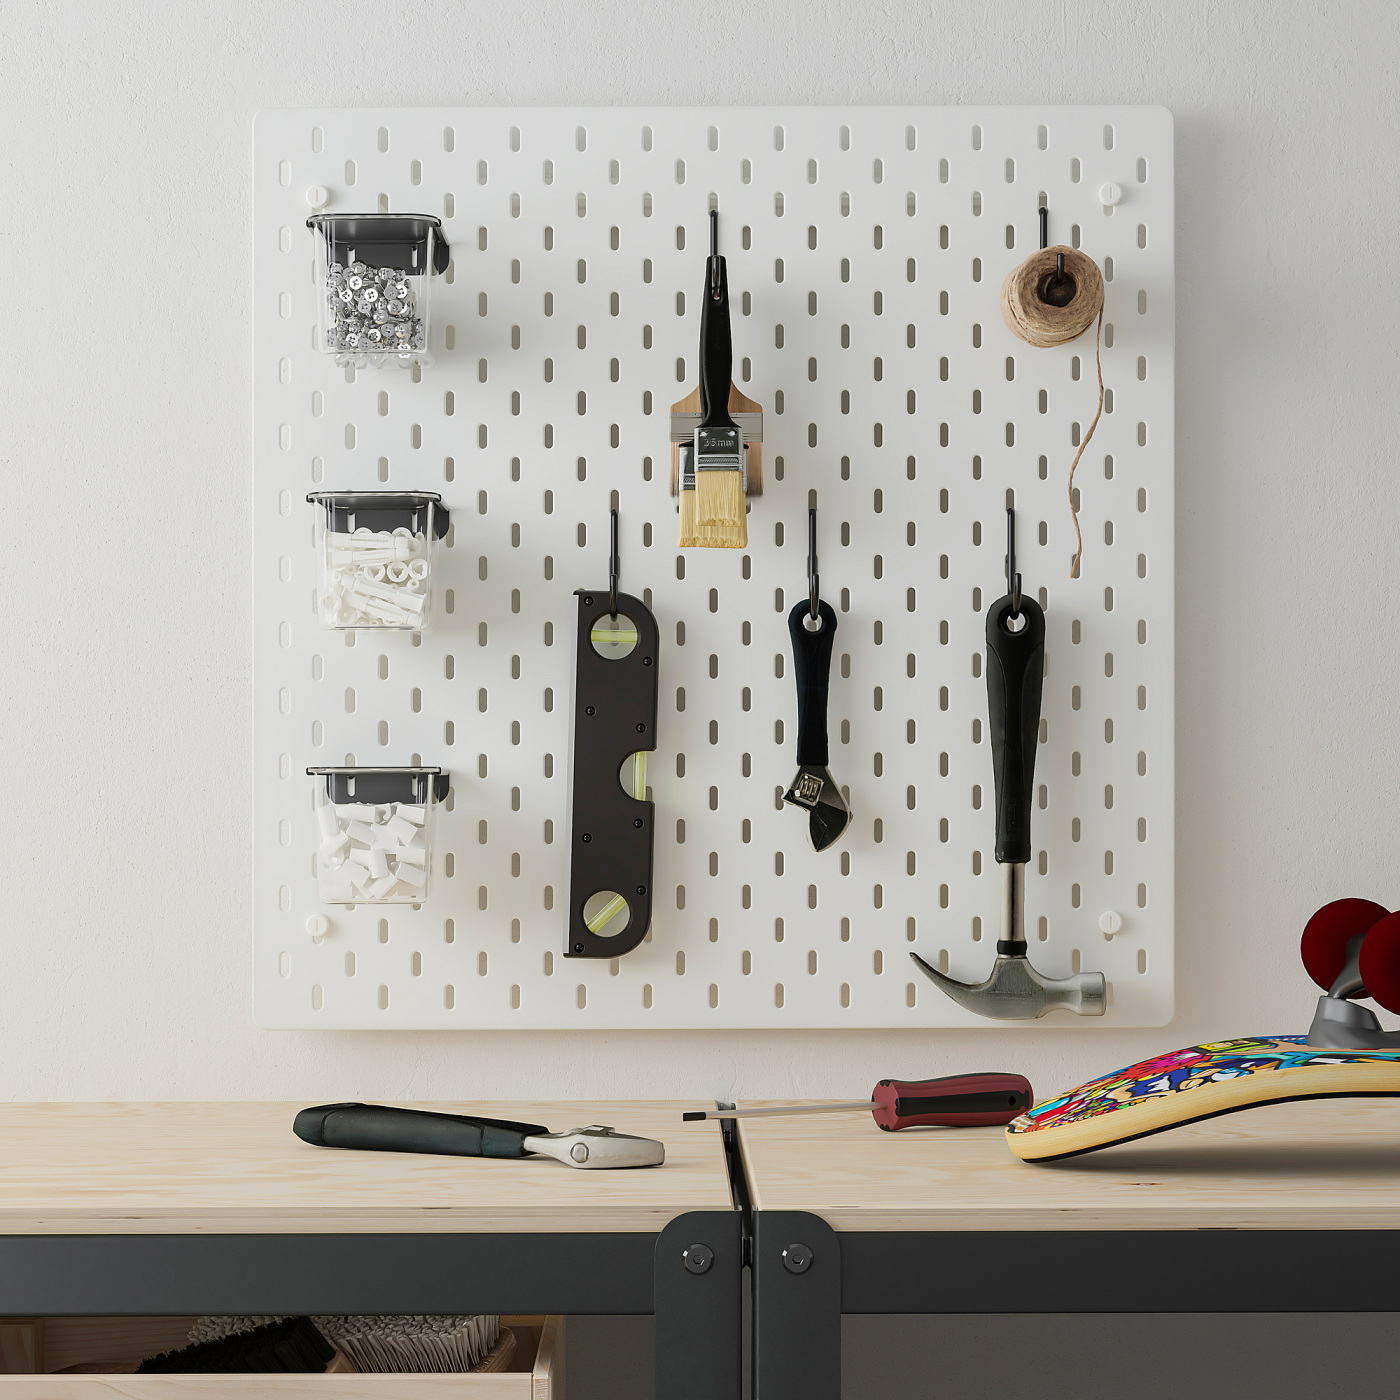
Reference example: IKEA's SKÅDIS workbench tool wall. The photograph illustrates tool placement and access; it is not a completed RONZ project.
Identify the holes, then check the specification
IKEA-style slots, round holes, and square holes are useful starting points. Their names alone do not establish whether accessories will work on two different panels.
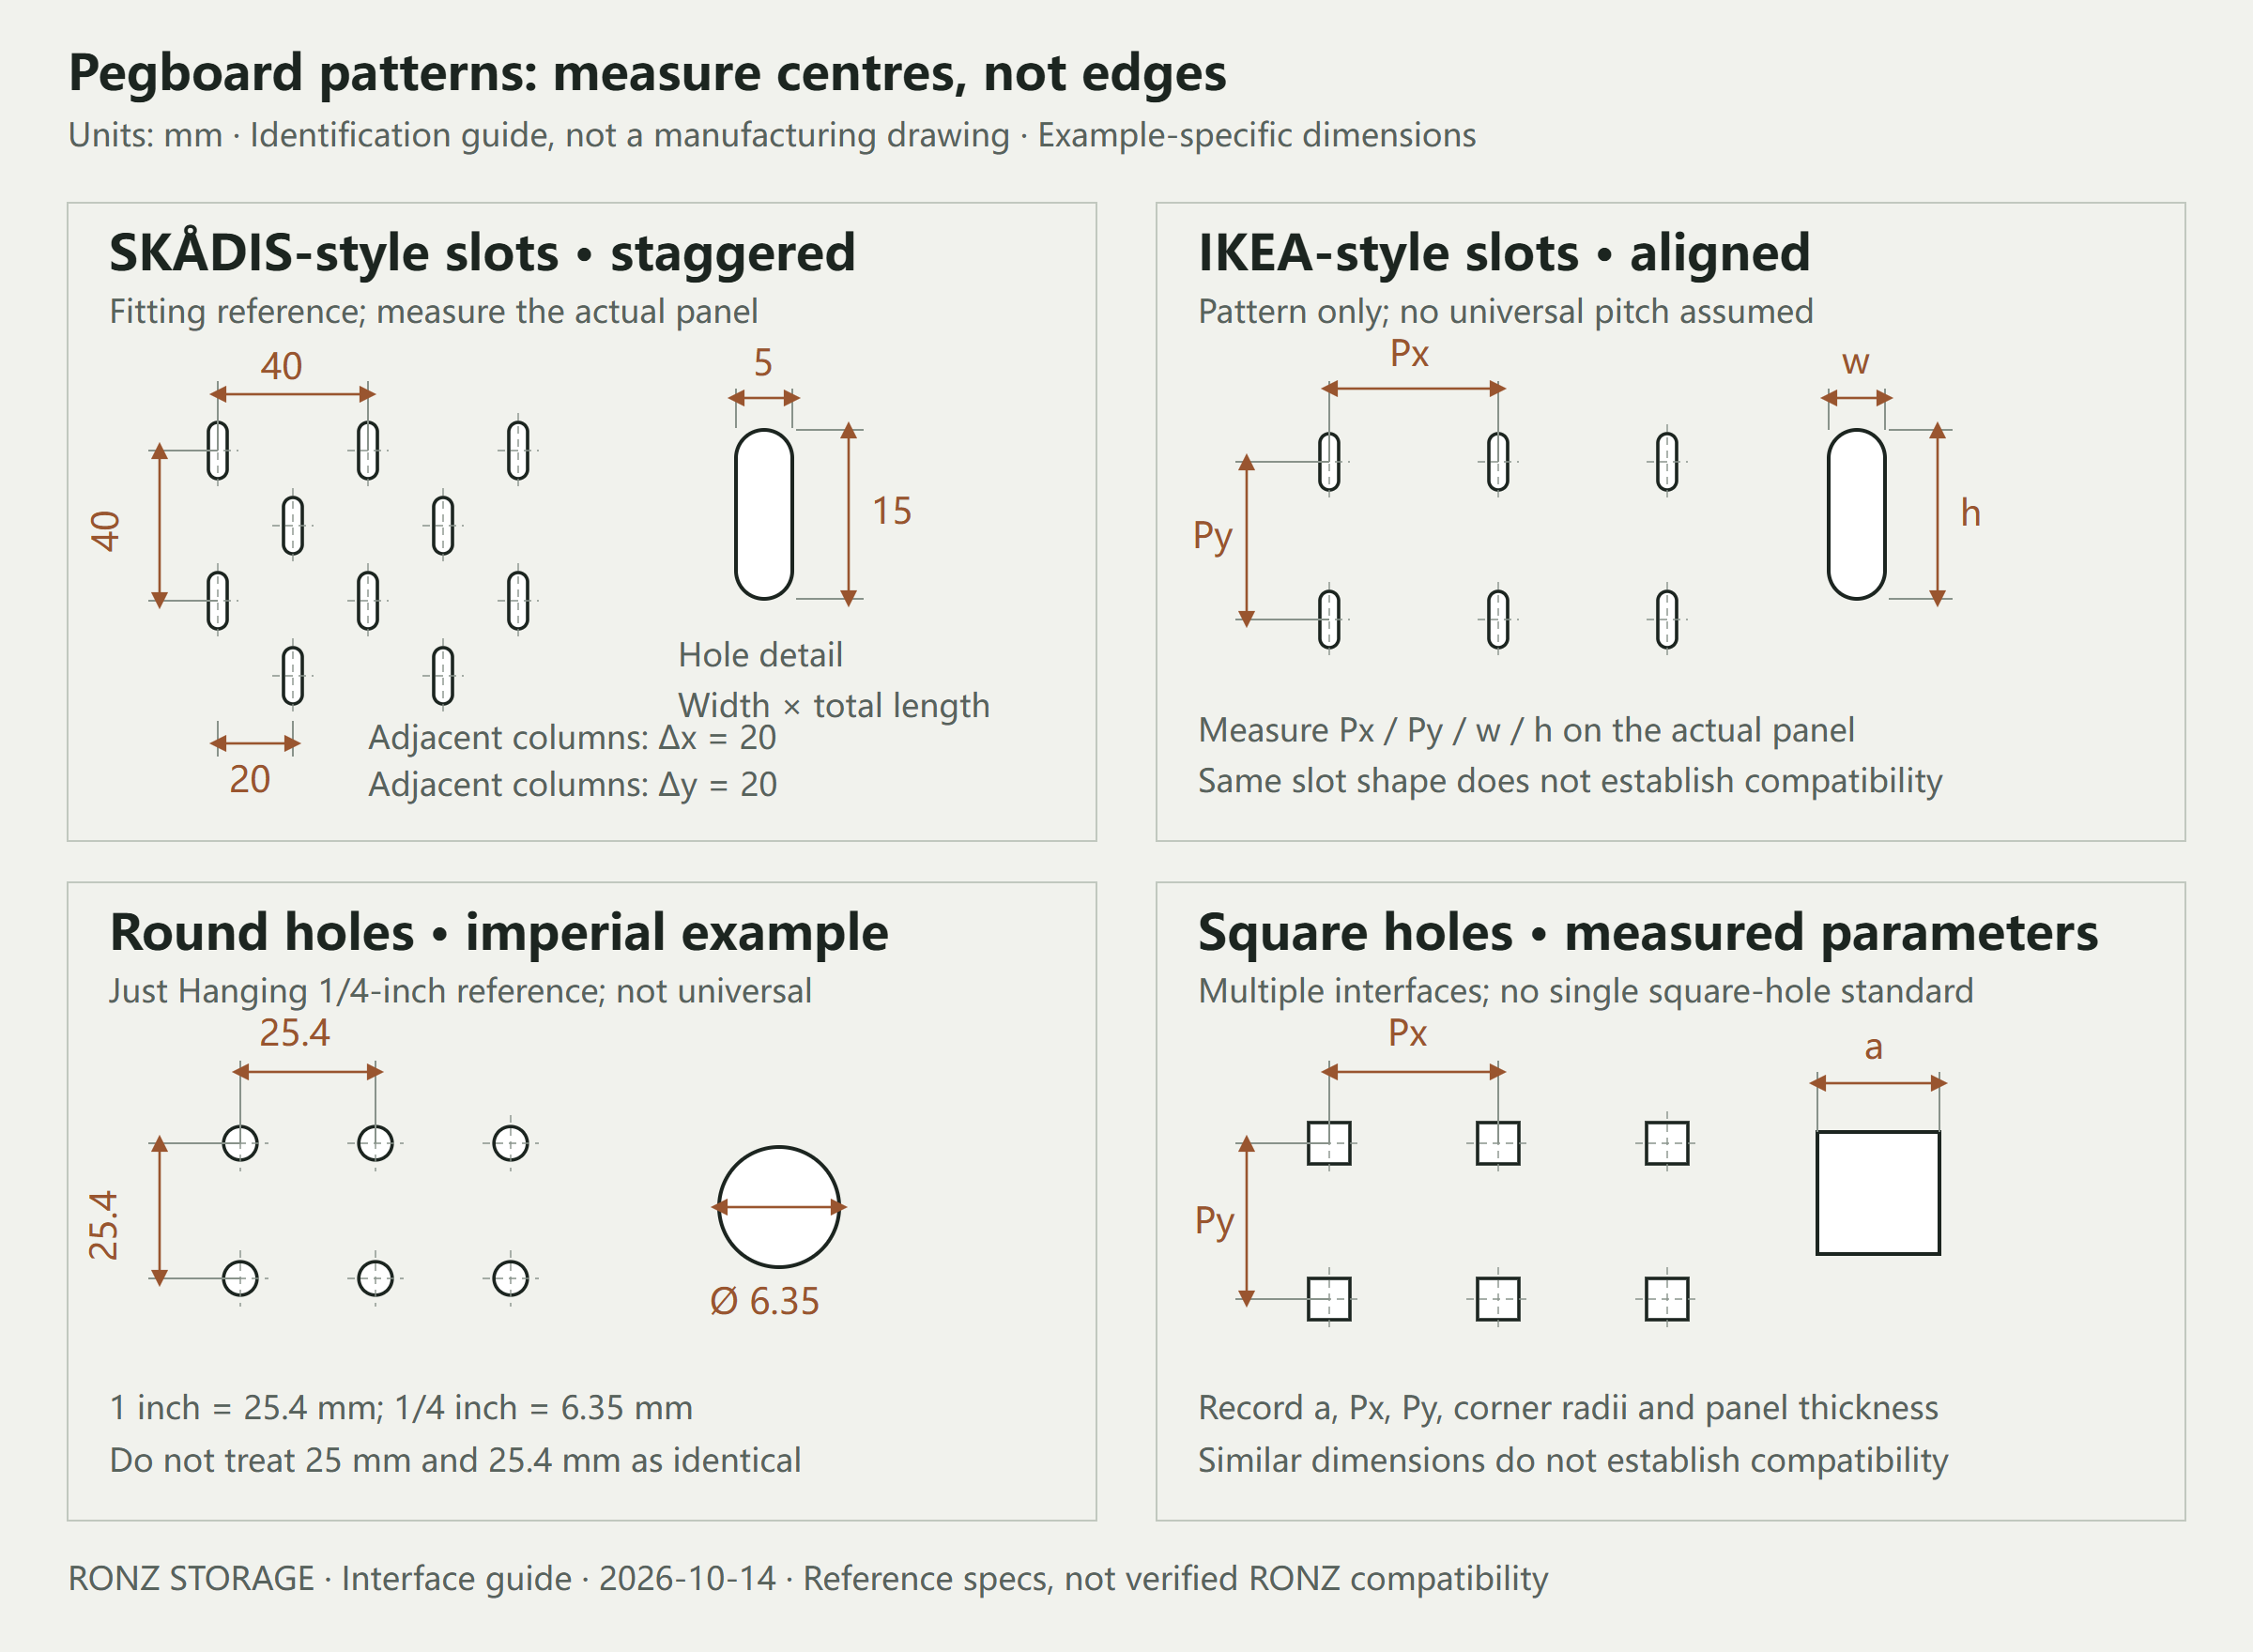
IKEA-style slots
The term usually refers to vertical slots with semicircular ends. Distinguish between two layouts:
- Staggered: adjacent columns are offset vertically. SKÅDIS-style fitting references use approximately 5 × 15 mm slots, with 40 mm between hole centres in the same row or column. Adjacent staggered columns have a horizontal spacing of 20 mm and a vertical offset of 20 mm. That 20 mm is not the spacing between neighbouring holes in the same horizontal row. Accessory dimensions and the generator author's notes are useful identification references; measure your actual panel before making accessories.
- Aligned: holes line up horizontally and vertically. Even when individual slots look identical, measure horizontal centre spacing Px and vertical centre spacing Py separately. Do not apply SKÅDIS staggered-layout dimensions to every aligned panel.
IKEA-style describes the hole shape and arrangement. It does not mean that every third-party slotted panel is an IKEA product or IKEA-certified.
Round holes
Describe round holes by diameter d, horizontal centre spacing Px, and vertical centre spacing Py. The diagram uses one imperial fitting example: a 1/4-inch diameter (6.35 mm) and 1-inch centre spacing (25.4 mm) in both directions, corresponding to Just Hanging's 1/4-inch accessory specification.
This is not a universal round-hole standard. Record metric panels from the actual product; 25 mm and 25.4 mm should not be treated as identical when fitting accessories across multiple holes.
Square holes
Describe square holes by side length a, horizontal centre spacing Px, and vertical centre spacing Py. Also check corner radii, formed edges, and the structure behind the panel.
The diagram uses parameters rather than one fixed specification: square-hole panels do not share a single interface. Similar hole sizes or pitches do not establish compatibility.
The same holes do not guarantee a fit across different thicknesses
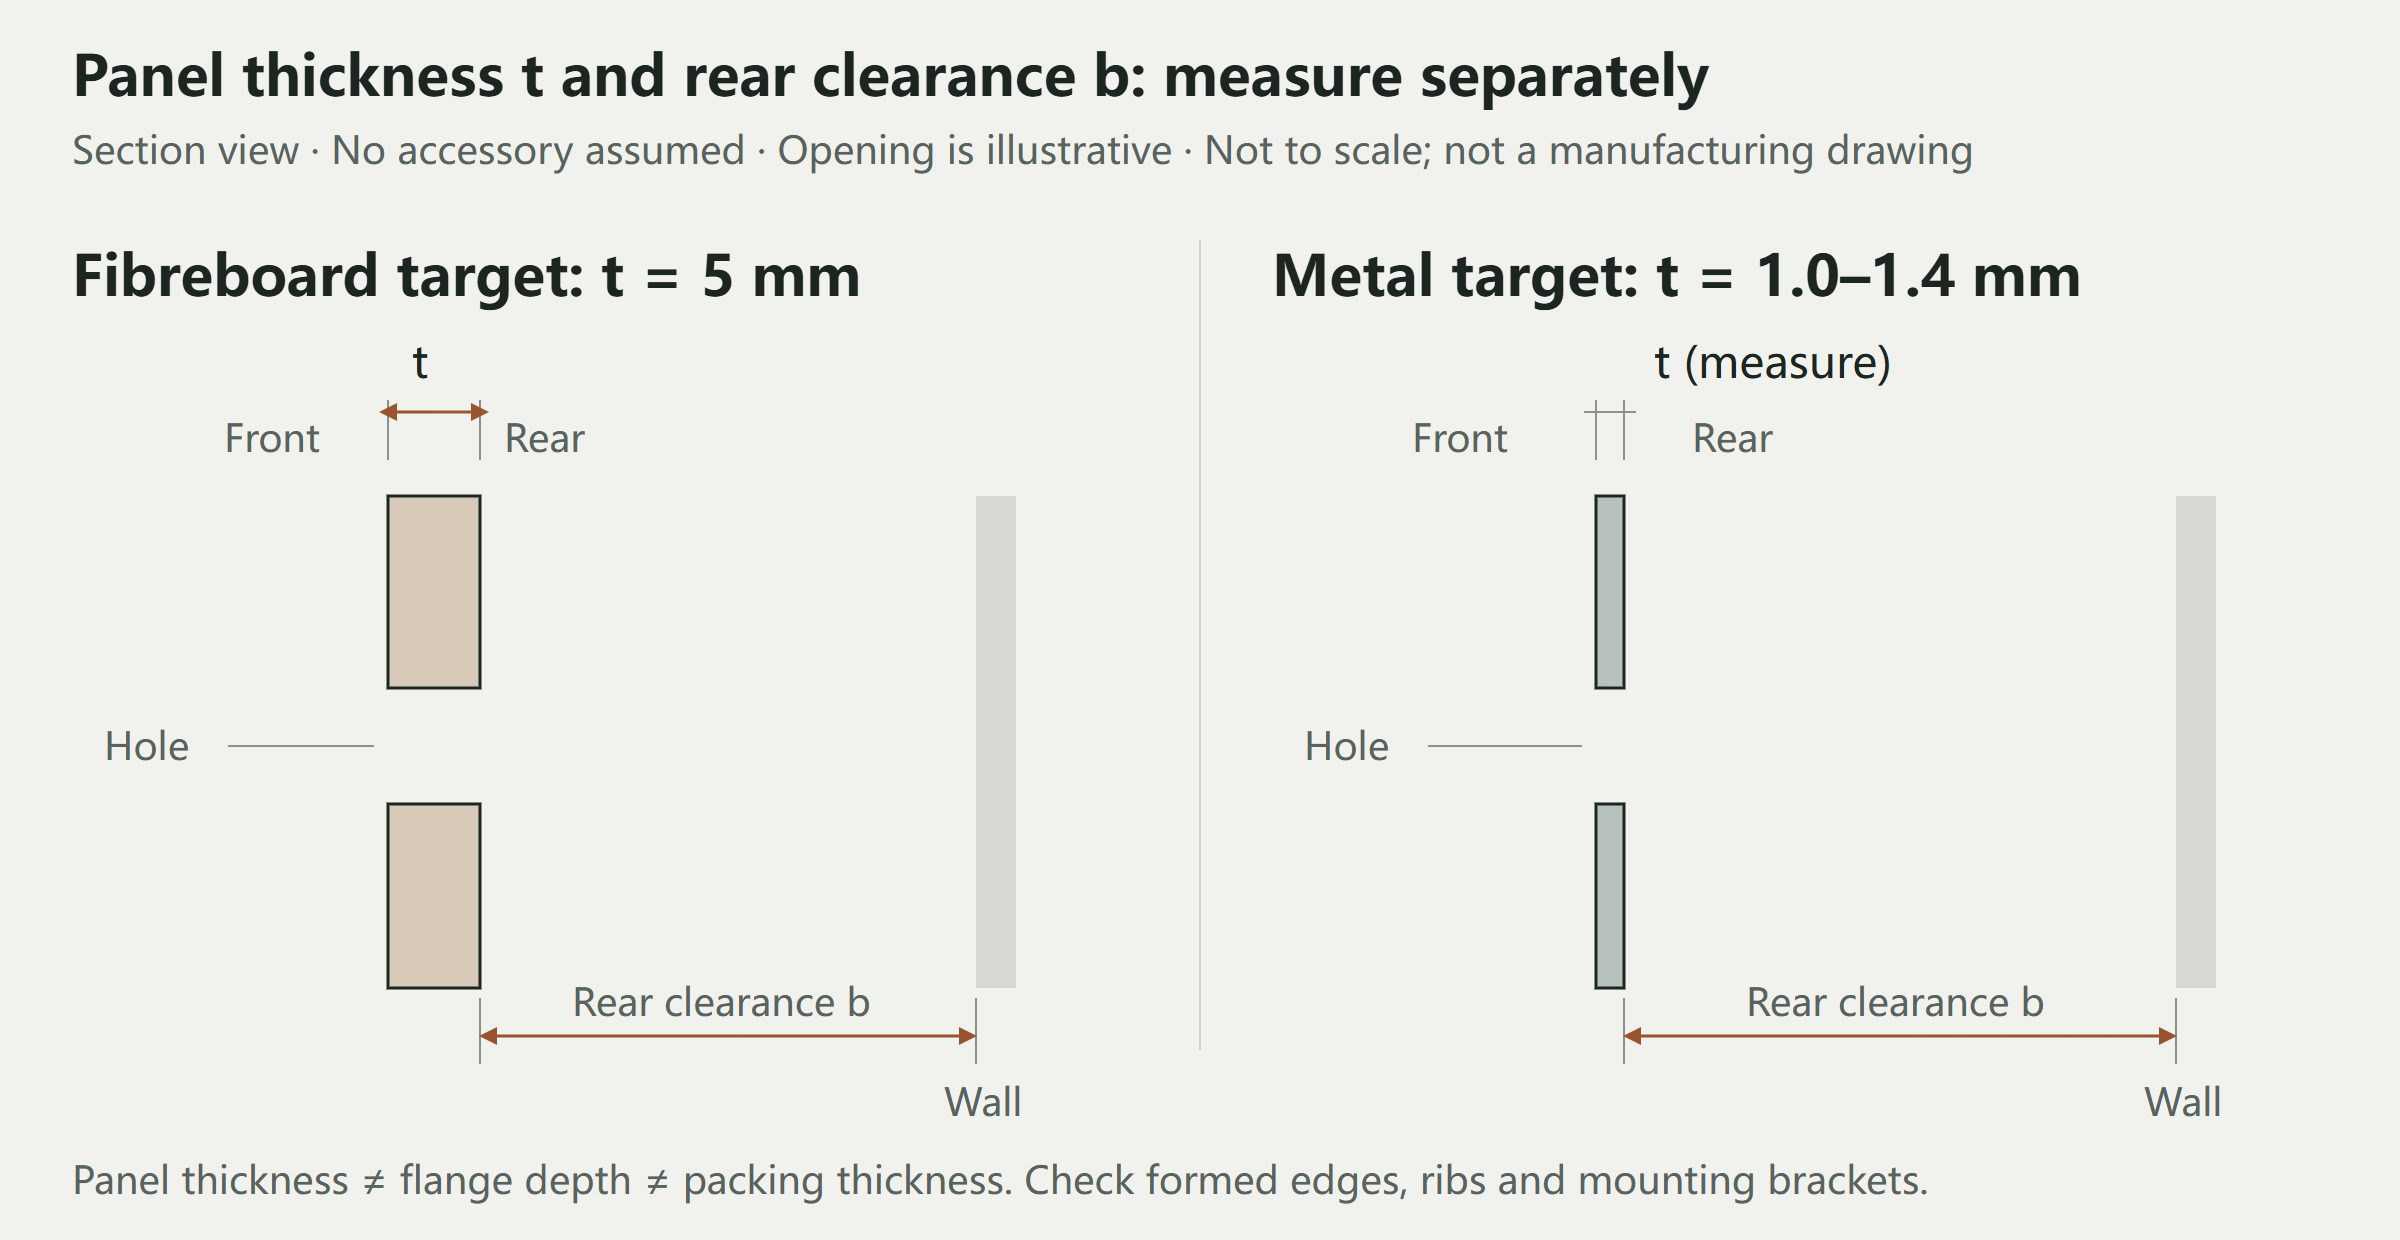
Fibreboard and metal are a separate classification axis; they are not alternatives to hole shape. IKEA's material description for SKÅDIS 003.208.03 specifies fibreboard and acrylic paint. That does not make a third-party slotted metal panel an IKEA metal panel.
Our intended fitting range includes 5 mm fibreboard and 1.0–1.4 mm metal panels. These are target specifications, not a claim about all panels on the market. Confirm each accessory against the dimensions of the actual panel.
Panel thickness affects engagement behind the panel and how closely an accessory sits against it. An attachment intended for a thick panel may be loose on a thin one; an attachment intended for a thin panel may not enter or engage a thicker one.
Measure the effective thickness where the attachment engages. Chamfers, formed edges, coatings, and rear reinforcement can all affect this location. The depth of a rear flange, packaging thickness, and face-panel thickness are different measurements.
Check your panel with this table
| Item | What to record | Why it matters |
|---|---|---|
| Hole shape | Slot, round, or square | Determines the insertion shape |
| Hole dimensions | Width and length, diameter, or side length | Determines whether the attachment can enter |
| Hole spacing | Horizontal and vertical centre spacing | Determines alignment across multiple fixing points |
| Layout | Aligned or staggered; offset amount | Determines the positions of fixing points |
| Material and thickness | Nominal thickness and effective engagement thickness | Determines fit, clips, and fixing method |
| Rear clearance | Distance from the rear face to the wall or another obstruction | Provides room to insert, rotate, or seat the attachment |
| Reinforcement and mounting | Flanges, ribs, brackets, and fixing points | Identifies interference between accessories and supports |
Measure spacing from hole centre to hole centre. A gap between the ends of two slots is not their centre spacing. Measuring several repeated intervals and averaging helps reduce reading error.
Use it around the workshop
Pegboards suit tools and materials that need frequent access and should remain visible. Start with the sequence of work, not with filling the panel: keep everyday tools within easy reach, group related items, and leave room to take them out and put them back.
Heavy power tools, valuable items, and anything sensitive to a fall need further checks of the holder, retention features, panel, and mounting supports. Neither metal construction nor hole shape alone establishes load capacity. Work surfaces, drawers, and frames can accommodate items that do not belong on the wall.
How RONZ can help
RONZ starts with accessories adapted to different pegboard types while also considering panel dimensions, mounting positions, and the wider workshop layout. Choose accessories for your existing panel, or start with the objects you need to store and plan the panel around them.
For the idea of separating the attachment from the storage body so that changing panels can retain more of the body, see our modular pegboard design exploration. This is a design and validation direction, not a claim that every panel type is already interchangeable.